Build your own Home Server and Made It Publicly Accessible on the Internet - Part 2

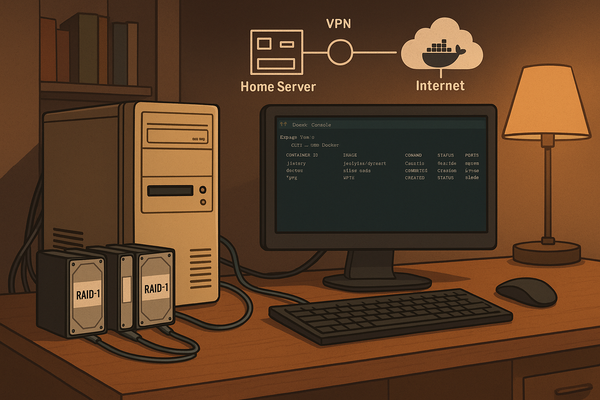
In the first part of this series, we went over what we can use to build a home server, how to set up Docker for service management and organize our enviroment in a clean and traceable way. Now it’s time to take things one step further, we’re going to make that home server accessible from anywhere in the world, without exposing it directly to the internet.
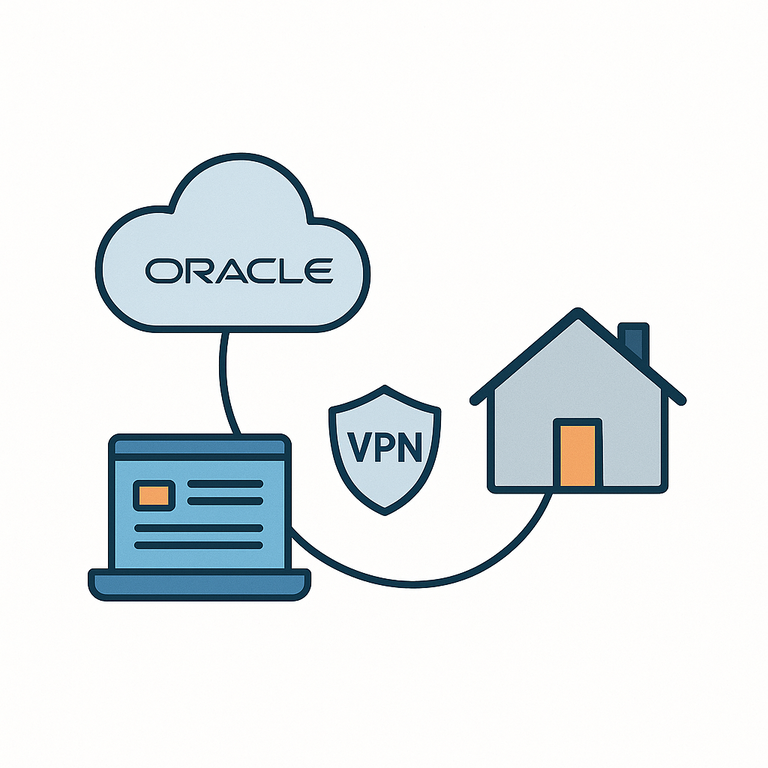
The idea might sound a bit intimidating at first, but it’s actually pretty simple once broken down. The key component here is using a VPS (Virtual Private Server) as a public-facing gateway. This VPS will have a static public IP address and serve as an intermediary between the internet and your home server. Instead of opening up ports on our router and dealing with dynamic IPs at home, all incoming traffic will hit the VPS, which will then securely forward it to your home server via a private VPN tunnel.
This approach has several benefits. First, it keeps your home network hidden and isolated from the public internet. You don’t need to mess with NAT rules, and you greatly reduce the attack surface of your local infrastructure. Second, it’s flexible, in a case if you ever move your home server to a different network (another house, a 4G backup connection, etc.), it will still work exactly the same. As soon as it connects to the internet, it joins the VPN and everything is back online. In other hand, this method increase the latency between the client and the server, add some complexity and it is not the suitable choice for all cases, but it is good enough to our home server.
In this post, we’ll go through all the steps: choosing and setting up a VPS, configuring a VPN between the VPS and your home server, and running a web proxy to route incoming requests to your services. Let’s get started.
Choosing and Setting Up the VPS
To make my home server accessible from anywhere on the internet, without exposing it directly or dealing with the complexity of NAT traversal, I decided to use a VPS (Virtual Private Server) as an intermediary. The VPS will acts as a gateway to our home server: it has a public IP address, receives the incoming traffic, and then forwards it securely to my home server over a VPN connection.
There are countless VPS providers out there, and honestly, almost any of them can work for this setup. The most important things to check when choosing your VPS are:
- It must have a public IPv4 (and ideally IPv6) address, so that it can be reached from the outside world.
- The internet connection should be unmetered or come with a generous bandwidth limit, since all traffic to your services will pass through this VPS.
- You should have access a it with SSH.
In terms of CPU and RAM, the requirements are minimal. We're not running heavy applications here, just a proxy and a VPN server, so even the most basic tier will usually be enough. If your traffic grows significantly in the future, you can easily scale up the CPU as you needed.
In my case, I went with Oracle Cloud’s Always Free tier, which includes two virtual machines with 1 vCPU and 1 GB of RAM each and it's actually free forever (as long as you stay within the limits and Oracle don't step back about it). A really cool thing about Oracle Cloud is that they let you choose the region where your VPS will run, and they have data centers in several countries. I was lucky to find a region in Brazil, which meant I could host the VPS in the same country as my home server to get a low latency around 20ms ping.
When creating the instance, I selected Ubuntu as the operating system, since it's the same I'm using for my home server and for storage, I assigned 40 GB of disk, which is plenty for our use case, we’re not storing files here, just running lightweight services.
After booting up the VPS for the first time, I installed Docker and updated the system, but I quickly noticed a detail that might catch some users off guard: by default, only port 22 (SSH) is open for external access. To allow traffic to your services, you'll need to manually open the necessary ports through the Oracle Cloud panel.
To do this, I navigated to the Virtual Cloud Network (VCN) section, opened the automatically created VCN for my instance, and then went into Security Lists to manage the ingress rules. There, I added rules to allow traffic on the following ports:
- Port 80 for HTTP
- Port 443 for HTTPS
- A custom port for the VPN connection
With those ports opened, the VPS was finally ready to act as my public entry point. The network is configured, Docker is installed, and traffic can reach the machine through the ports I need. The next step is establishing a secure VPN tunnel between this VPS and my home server.
Establishing the VPN
To securely connect your home server to the VPS I created a VPN tunnel between them. For this, I chose WireGuard: it’s extremely fast, simple to configure, and performs well even with limited hardware power.
Step 1: Install WireGuard on Both Machines
First, install WireGuard on both your VPS and your home server. On Ubuntu, it’s just:
sudo apt update
sudo apt install wireguard
Step 2: Generate Keys on Each Machine
On both machines, generate a private and public key pair:
wg genkey | tee privatekey | wg pubkey > publickey
This will give you:
privatekey— used locallypublickey— shared with the other machine
⚠️ Never share your private key. Usecat privatekeyandcat publickeyto copy the contents when needed.
In my case, I created the keys using root and placed them in the folder /etc/wireguard, so anyone that need to open this file should have at least root access.
Step 3: Configure WireGuard on the VPS
Create the WireGuard config on the VPS:
sudo nano /etc/wireguard/wg0.conf
Example of my config (wg0.conf) for the VPS:
[Interface]
## My VPN server private IP address ##
Address = 10.8.0.1/24

## My VPN custom port ##
ListenPort = <CUSTOM_PORT>

## VPN server's private key i.e. /etc/wireguard/privatekey ##
PrivateKey = <VPS_PRIVATE_KEY>
MTU = 1360


[Peer]
## client VPN public key ##
PublicKey = <HOME_PUBLIC_KEY>
PersistentKeepalive = 10
## client VPN IP address (note  the /32 subnet) ##
AllowedIPs = 10.8.0.2/32
Replace:
<CUSTOM_PORT>with some port you want to use for the VPN.<VPS_PRIVATE_KEY>with the contents of the VPS private key.<HOME_PUBLIC_KEY>with the public key from the home server.
⚠️ I experienced some issues running this VPN on Oracle Cloud using the default MTU. To fix it, I had to set MTU = 1360. If you're facing problems like random packet drops, unstable connections, or similar issues, try lowering the MTU value it might solve the problem.Step 4: Configure WireGuard on the Home Server
Now on the home server, create its config:
sudo nano /etc/wireguard/wg0.conf
Example of my config (wg0.conf) for the home server:
[Interface]
PrivateKey = <HOME_PRIVATE_KEY>
## Same address configured at the peer with /24 to use the same subnet.
Address = 10.8.0.2/24
## Same MTU at the server side
MTU = 1360

[Peer]
PublicKey = <VPS_PRIVATE_KEY>
AllowedIPs = 10.8.0.0/24

## Your Ubuntu 20.04 LTS server's public IPv4/IPv6 address and port ##
Endpoint = <VPS_PUBLIC_IP>:<CUSTOM_PORT>

##  Key connection alive ##
PersistentKeepalive = 15
Replace:
<HOME_PRIVATE_KEY>with the home server's private key.<VPS_PUBLIC_KEY>with the public key from the VPS.<CUSTOM_PORT>with port of your VPN.<VPS_PUBLIC_IP>with the public IP of your VPS.
The PersistentKeepalive = 15 helps maintain the connection from behind NAT (useful for home networks).
Step 5: Enable and Start WireGuard
Enable and start WireGuard on both machines:
sudo wg-quick up wg0
sudo systemctl enable wg-quick@wg0
If everything is correct, you'll see handshake information and traffic counters when you execute the command:
sudo wg
Some notes
As you can see, regardless of which network your home server is connected to, once it establishes a VPN connection, it creates a direct communication channel with the VPS. It's important to note that the server’s internet traffic still follows its normal route, the VPN only allows secure communication between the home server and the VPS, without routing all outbound traffic through the VPN.
This setup is also incredibly useful if you ever need to move your home server to another location or use a secondary internet connection as a fallback. As soon as the home server connects to the internet, it automatically re-establishes the VPN with the VPS, and all your services come back online just like before.
Setting Up the Proxy Server
To manage incoming traffic and route it to the correct services running on my home server, I use Nginx Proxy Manager. It’s a simple and powerful web-based interface that lets you configure reverse proxies, SSL certificates, and custom domains without touching any Nginx config files manually.
Since we’re already running everything in containers, setting up Nginx Proxy Manager with Docker Compose is straightforward. Here's a simple docker-compose to run this service:
version: '3'
services:
  app:
    image: 'jc21/nginx-proxy-manager:latest'
    restart: unless-stopped
    ports:
      - '80:80'       # HTTP
      - '443:443'     # HTTPS
      - '81:81'       # Admin UI
    volumes:
      - ./data:/data
      - ./letsencrypt:/etc/letsencrypt
Keep in mind that you need to open port 81 on your VPS to access the Nginx Proxy Manager's admin panel. For security reasons, I personally use a random high-numbered port instead of the default 81.
To access the panel, simply enter your VPS IP followed by the port in your browser (e.g., http://<VPS_IP>:81). On your first login, the default credentials are:
Email: admin@example.com
Password: changeme
Right after logging in, the system will prompt you to change the default email and password to secure your installation. You can see more about how to start with Nginx Proxy Manager in this guide.
For the next steps, you'll need to have a DNS domain pointed to your VPS. This is essential so that we can route traffic from that domain to the services running on your home server. Once your domain is properly configured, you can easily add a service from your home server by creating a Proxy Host in Nginx Proxy Manager. Just enter the domain name, set the internal IP to 10.8.0.2 (which is the Home Server’s IP inside the VPN), and specify the port where the service is running.
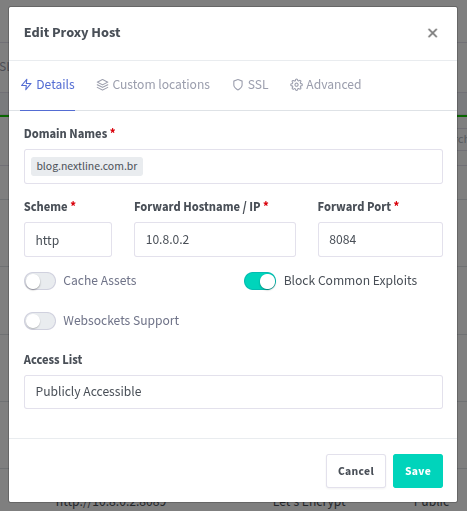
Make sure to select the correct protocol that your service inside your home server uses: HTTP or HTTPS. One of the great features of Nginx Proxy Manager is that it allows you to request and install an SSL certificate automatically via Let’s Encrypt, as long as your domain is pointing correctly to the VPS. This ensures your services are served securely with HTTPS.
Final Thoughts
And that wraps up the core setup of my self-hosted home server architecture. I came up with this strategy after moving to a new place where my ISP no longer offered a fixed IP address, and honestly, it turned out to be a much more reliable and flexible this approach in the long run.
Since then, I’ve moved the server around multiple times and I’ve never had to reconfigure anything. As soon as it connects to the internet, the VPN kicks in, and everything is instantly back online. No manual tweaks, no headache.
If there’s interest, I’d love to write a Part 3 based on suggestions or questions you might have. I plan to keep sharing more about my journey in self-hosting, so feel free to follow the blog and leave a comment. I really appreciate the feedback from the last post!